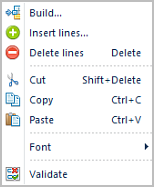
You can add or delete lines within your Line Definition by using the Insert option on the Line Definition context sensitive ribbon or by selecting the option using the right-click mouse button on the Line Definition workspace.
The right-click option provides you with a pop-up menu to add, modify or delete rows of data, modify their appearance, or, cut, copy or paste rows in the Line Definition from external sources.

You can select to add rows to your Line Definition when you
have multiple selections. In this instance, the Insert or Insert lines option
will insert the rows before of each selection. In addition:
1. If you
select a single row, there is one row inserted above the selected row.
2. If you select a row, then use the shift key to select more than one row, this is also considered a single selection one row will be placed before the first row selected.
3. If you select multiple rows using the CTRL and mouse click method, each selection will have a row inserted before them.
The right-click options also allow you to Validate the data in your Line Definition to provide you with information on duplicate or missing data.
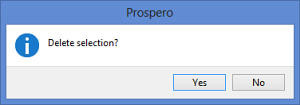
Lastly, if you delete a row from the Line Definition workspace, Prospero will prompt you to confirm the action.
