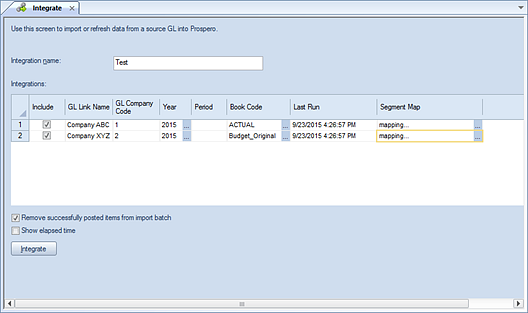
The Integrate process allows you to import or refresh data from a source GL to Prospero.
To execute a Prospero Integration process:
1. Open the Integrate workspace by clicking on the Integrate icon in the Data Integration Navigation Pane.

2. Enter the fields and options necessary for your Integration job. Fields and options on the workspace include the following:
•Integration name – This field specifies the name of the integration for identification later. The field can contain up to 24 characters. This is a required field.
•Include – This checkbox option allows you to select which integration to perform.
•GL Link Name – This field shows the General Ledger Link Name linked to the Entity for which the integration is run. Refer to your Entity definition.
•GL Company Code – This field shows the General Ledger Code ID linked to the Entity for which the integration is run.
•Year – This field limits the integration to the year value specified. Select the ellipsis to select a valid year from the dialog which will populate the Year field.
•Period – This field allows you to define the period(s) for the integration process. You can enter more than one character to represent multiple periods by separating each period value with a comma (,).
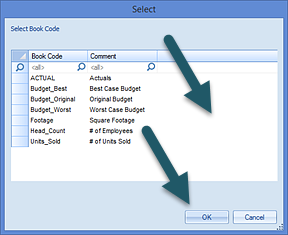
•Book Code – This field limits the integration to the book code value specified. Select the ellipsis to select a valid book code from the dialog which will populate the Book Code field.
You can clear any prior existing selections by clicking outside of the existing selection (or a new selection) and then clicking the OK button.

•Last Run – This field indicates the last time the integration was run.
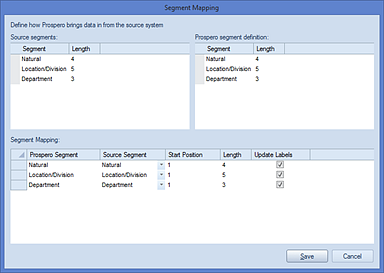
•Segment Mapping – Selecting the ellipsis in this field opens the Segment Mapping dialogue. On this dialog, you can view how Prospero integrates data from your sourced GL system.

The Source and Prospero segment definition sections are informational. The Segment Mapping section allows you to select how to map your source data to Prospero using the Source Segment pulldown option. You can also specify your data’s Start Position, Length and whether or not to update segment labels, where they differ between systems.
•Remove successfully posted items from import batch - This checkbox option allows you to remove successfully posted items from the batch. Where large amounts of data are processed, this option will limit the amount of time and data required as part of any re-post process.
•Show elapsed time – When checked, this checkbox will provide the amount of time that the process took to run once completed.
3. Select the Integrate button to complete the date integration. (You must enter an Integration name for the Integrate button to activate.)
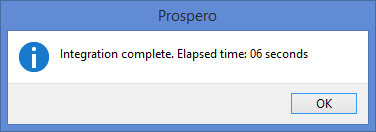
4. When
your Integration process has completed, you will receive a system message
notifying you to the effect. (If you checked the Show elapsed time checkbox you
will receive a message including the time that the process took to run.)

The Integration process will automatically run a Resummarize process when the process is executed.
In addition, the Integration process will be listed in the Activity log which is available from the Tools ribbon.

The Activity Log will include the Integration Name in the Information field and which GL Link Name is associated to the integration process in the Name field column.
Note: If the segment lengths in the Segment Definition screen have been updated or changed in the Segment Definition screen, henceforth running the Integration process will not update the lengths of the segment definitions.